Easily power algo trading with the popular pyalgotrading


Easily power algo trading with the popular pyalgotrading
In today’s guest post by AlgoBulls, we introduce pyalgotrading which is a Python package that helps create execute trading strategies.
Creating trading strategies with pyalgotrading is easy. The highlight of this process is that it can be done on any platform including web app, Jupyter notebooks or command line.
Today, we’ll get started with a simple example to demonstrate how pyalgotrading works.
Let’s go!
Easily power algo trading with the popular pyalgotrading
AlgoBulls is an algorithmic trading platform that makes it easy to backtest and execute strategies.
To set up a workspace for running pyalgotrading package on jupyter notebook, you can follow the steps in the documentation. Once set up is completed and you have launched the notebook, you’re ready!
Imports and set up
First, we need to import pyalgotrading and establish a connection. Instructions to get your access token, are here. After you connect, you can list all your saved strategies.
1from pyalgotrading.algobulls import AlgoBullsConnection
2
3connection = AlgoBullsConnection()
4
5connection.set_access_token("<your-access-token>")
6
7connection.get_all_strategies()
For every strategy, you will get a unique ID for the strategy. The ID will be used in other functions for the parameter called “strategy_code” or “strategy”.
Upload a strategy
If you have a strategy, you can upload it to your AlgoBulls account. Let’s use the EMA crossover strategy as an example. Grab the code here on GitHub. Save the code as a .py file, import it into the Notebook, and save into your account.
1from ema_crossover import StrategyEMARegularOrder as strategy_cls
2
3response = connection.create_strategy(
4    strategy_cls,
5    overwrite=True
6)
7strategy = response['strategyId']
Execute the backtest
Execute the backtest by setting the parameters for the strategy and calling backtest.
1parameters = {
2  "TIMEPERIOD1": 12,
3  "TIMEPERIOD2": 20,
4}
5
6vendor_details = {
7    "brokerName": 'ALPACAV2',
8    "credentialParameters": {
9        "CLIENT_API_KEY": "<your-client-key>",
10        "CLIENT_API_SECRET": "<your-client-key>"
11    }
12}
13
14connection.backtest(
15    strategy=strategy,
16    start="2021-08-01 09:15 -0400",
17    end="2023-07-31 15:30 -0400",
18    instrument="NASDAQ:MSFT",
19    lots=5,
20    parameters=parameters,
21    candle="1 hour",
22    vendor_details=vendor_details,
23    initial_funds_virtual=5000
24)
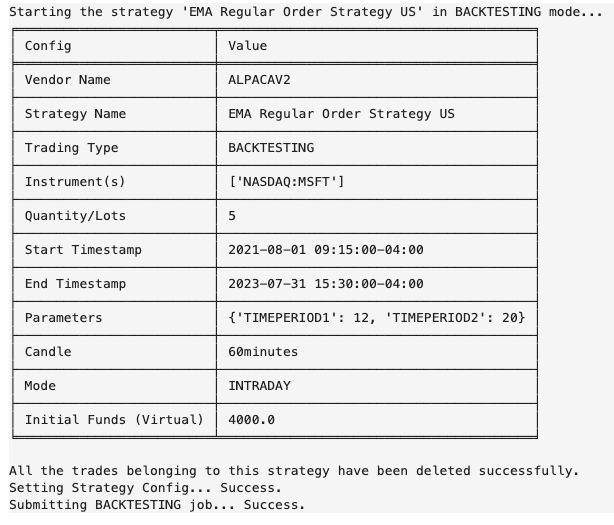
Once the strategy backtest starts, you’ll be notified with output from pyalgotrading.

Output the strategy analysis
Once your strategy’s execution is finished, you can check its results and performance. For that purpose, you can retrieve the performance report as a DataFrame to perform further analytics.
1connection.get_backtesting_report_pnl_table(strategy)You can easily compute industry-standard metrics like Sharpe and Sortino ratios using the above simple function call. It generates these metrics in a tabular format.
Vizualizations, in the form of charts, offer insights into your strategy's performance. Each chart provides a unique perspective on your trading strategy's behaviour.
1connection.get_backtesting_report_statistics(
2        strategy_code,
3        report="full",
4        html_dump=True
5)
This outputs a QuantStats report depicting the strategy performance.

Next steps
As a next step, review the comprehensive AlgoBulls documentation and create your own strategy. You can use the same boilerplate code from this example to backtest it.
